
When you first activate Monsoon Marketplace, some basic settings will be configured for your company, and for overall inventory management, using the setup wizard. These settings can be updated using the options on the Settings tab, by clicking the My Company folder.
Defining roles and limiting access to your software using permissions helps you to keep your software working right, and your employees focused on just the areas of the product they need to complete their tasks.
Monsoon Marketplace allows you to control access to all aspects of your software. You do this by creating roles and assigning user permissions to these roles. Roles may then be assigned to specific users

A role defines what sort of work a user is able to do in Monsoon Marketplace. Roles define the amount of access a user has to features. For example, you could create roles and assign permissions as follows:
Table 1: Explanation of User Permissions
| Permissions | Definition |
|---|---|
| Inventory Management | Full access to the My Inventory tab, except for item pricing features. |
| Receiving | Full access to the Inventory Receiving tab, except for item pricing features. |
| Rapid Receiving (for Monsoon Marketplace with Warehouse Tools) |
Access to the Rapid Receiving dialog. Users may not use this permission if they have also been assigned Receiving permissions. Receiving permissions supercedes Rapid Receiving permissions. |
| Bulk Edit | Access to the bulk edit feature, except for item pricing features. |
| Import/Export | Access to the import and export features. |
| Basic Admin | Access to all areas, except for the Users page. |
| Advanced Admin | Full access to all features. |
| Inventory Pricing | Access to all pricing features. |
| Manage Orders | Access to the Orders tab, except refunds features. |
| View Reports | Access to the Reports tab. |
| Issue Refunds | Enables the user to issue order refunds. |
| Ship Problem Orders and Cancel/Refund Orders | Enables the user to ship problem orders and cancel and/or refund orders. |
| View Event Viewer | Enables the user to view the Event Viewer tab. |
Users are the people who will be accessing Monsoon Marketplace features and functionality. Every person who uses the software should be assigned a user name and password. As part of this, each User Name should be assigned one or more roles that corresponds to the parts they play in your business.

Only a user with Advanced Admin access can create roles in Monsoon Marketplace.
Permissions may be added and removed from Roles at any time by disabling and enabling items in the Role Permissions Editor.

Roles may be added and removed from users at any time by disabling and enabling items in the User Roles Editor.
Whenever you make changes to any part of the Users settings, be sure to click OK at the bottom of the window to save your changes.
As part of its regular maintenance, Monsoon Marketplace checks for updates to download and install on your system.
Under Software Update Preference, you can pick the of time of day that works best for these periodic updates.

This feature applies to the following markets only:
Use the drop-down menu to choose your Default Shipping Carrier.

The Default Shipping Carrier will appear on the Orders tab for Amazon and Data Exchange orders. This setting may be manually overridden on an order-by-order basis.
The physical address information that appears in the Address settings will appear on your packing slip.

Except for the Address 2 field, you must provide an address on this page. This is because certain markets will not let you publish without an address.
This information will appear the same on all of your packing slips, no matter what the source of the order.
Your business identity and email address may be entered separately for each online market you have enabled in Monsoon
For more information, see Markets.
See Classifications and classification notes.
Monsoon can manage sending shipment notifications and cancellation notifications to your customers.
These emails will be sent whenever you set an order to Shipped, Partial Shipped or Canceled status.
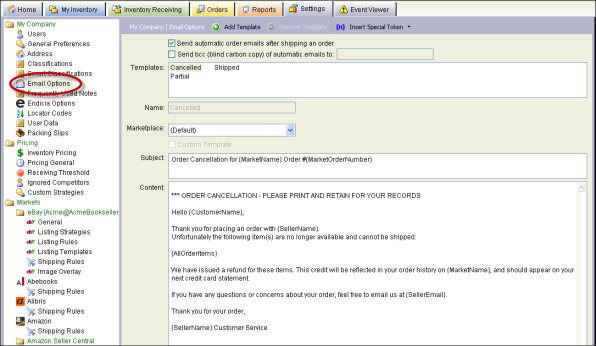
The Email Options settings allow you to enable and configure these email notifications.
Monsoon does not send automatic email notifications to Amazon, Alibris, and BN.com in accordance with market policy.
Amazon, Alibris, and BN.com each manage the following routine email notifications as part of the market's standard workflow:
For non-routine email communication with your customers, Monsoon default and custom email templates are available to use.
Monsoon ships with a default set of email templates. But you have many options for customizing how they look and what they tell your customers.
You initially have three email templates for each enabled marketplace that supports email functionality:
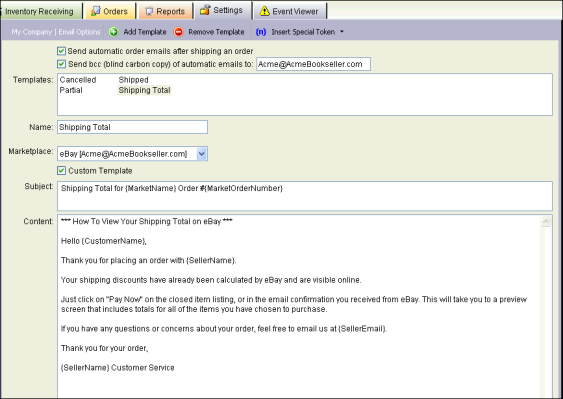
You may customize these templates by altering the text in the content window.
See how to Back-up Email Templates
By typing the text you want in the Subject and Content windows, you can send any automated email message that you like.

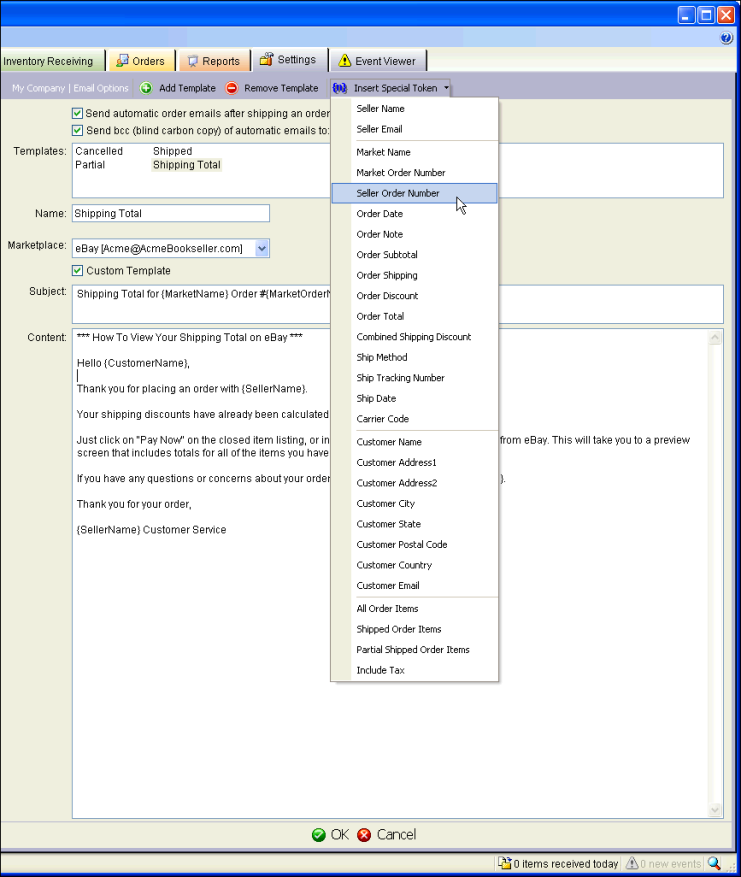
You also have the option to insert Special Tokens into your email templates.
These Special Tokens will dynamically change for every order, filling in specific information such as:
See how to Insert a Special Token {n} Into Email Text
Customized Email Templates may be used when sending Manual Order Emails.
For more information, see Manual Order Emails.
Position your cursor at the point in your text where you would like your token to appear.
Using your mouse, select your Special Token from the Insert Special Token drop down menu at the top of the window.
If you do change these fields then the Special Token will no longer work.
Monsoon does not send automatic email notifications to Amazon, Alibris, BN.com, and Buy.com policy in accordance with market policy.
Amazon, Alibris, BN.com, and Buy.com each manage the following routine email notifications as part of the market's standard workflow:
For non-routine email communication with your customers, Monsoon default and custom email templates are available to use.
If you would like Monsoon to BCC (Blind Carbon Copy) an address with the emails it sends:
You can back up your email templates to keep other versions or for disaster recovery.
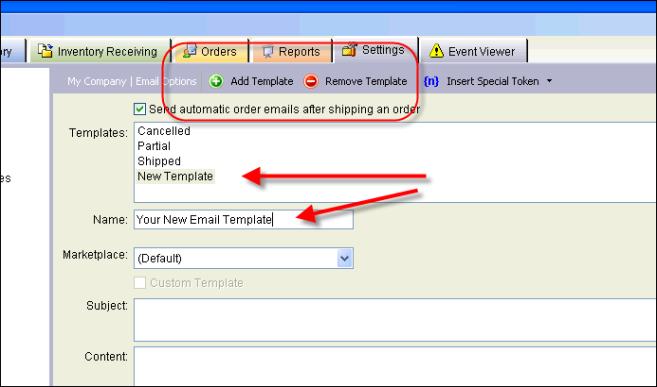
You may create additional email templates in the Email Options settings.
Additional email templates may prove useful for servicing Custom Markets customers, or for handling recurring Customer Service issues.
You may also manually manage your email from the Orders settings. For more information, see Manual Order Emails.
A Frequently Used Note is a generic item description that you may want to use for many different items. This saves you the time of retyping a common note that you use frequently.
By configuring a variety of Frequently Used Notes, you will have a list of ready-made statements that you can attach to any inventory item you receive.

Frequently Used Notes appear as Item Notes on each inventory item they are attached to.
Here are some examples of useful notes:
Your Frequently Used Notes are always created from the Frequently Used Notes settings.
Once they appear in your Frequently Used Notes list, you will have easy access to them when receiving items or managing inventory.
To create a list of ready made statements that you can attach to each inventory item you receive
Go to Settings > My Company > Frequently-Used Notes.
Enter each new inventory note you wish to have available here.
Your new note will now appear on your drop-down list of notes whenever you receive an item or look up inventory.
Edit any existing notes by clicking on the line and typing in your changes.
See Endicia DAZzle shipping integration overview.
See Locator codes and locator slips.
Monsoon's Data Exchange feature allows you to integrate Monsoon with non-Monsoon systems.
In some cases, a non-Monsoon system will require that Monsoon take in key information to pass back to the non-Monsoon system, but which is not necessary to the functioning of Monsoon.
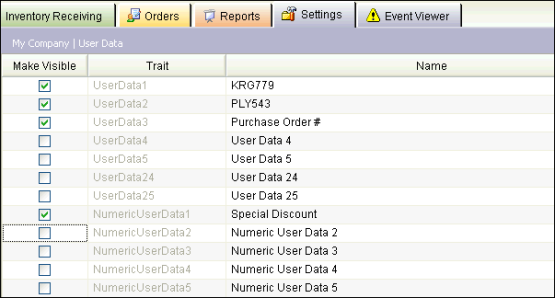
To name your UserData fields, simply type your desired field name alongside the appropriate UserData field.
Click OK to save your changes.
To make your User Data fields visible in the My Inventory and Receive Items settings, check the Make Visible boxes beside each Trait you would like to see appear.
Packing Slips can be used to pick, pack, and create mailing labels.
Any orders which you select to Print in the Orders tab will be sorted according to the selection you make in this section.

For example, the Title of a 10-inch circular saw might be ì10-inch circular saw." If Artist or Author does not exist for an item, these characteristics will be skipped in the sorting process.
You can configure Monsoon to print a sku's Note field on your packing slips by selecting the "Print item notes on packing slips" option.
You can customize your packing slip to tailor it to your business and your buyers.
Many aspects of your packing slip are customizable such as:
You can customize packing slips for the following marketplaces:
You cannot customize packing slips for the following marketplaces:
For Amazon US, Amazon UK, Amazon CA, Amazon FR, Amazon DE, eBay US, and eBay UK (all of these markets utilize the same packing slip template), save your packing slip file as packingSlip.rtf.
If your packing slip fails to print and the order is set to Printed status in Monsoon, then there is a problem with your packing slip.
For example:
You may move the ShippingHeader token to any location on your packing slip that you like.
You cannot change the token, itself — ShippingHeader must remain ShippingHeader, or the packing slip will not print correctly.
See Importing and exporting overview.
©2016 Monsoon, Inc. All rights reserved.