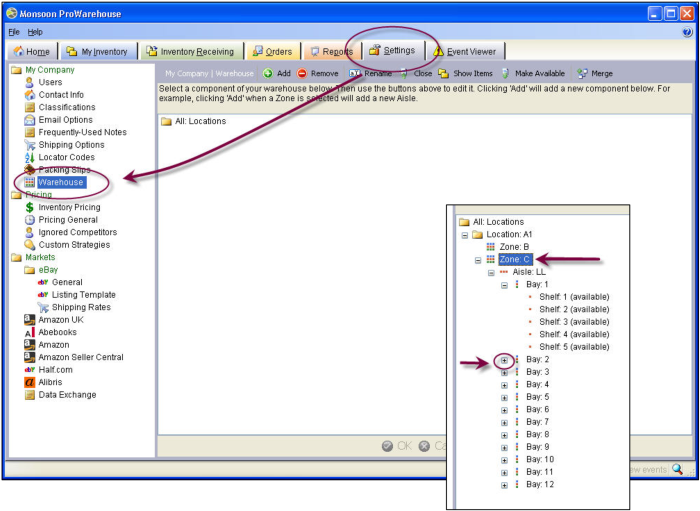
To view your Warehouse settings, go to Settings > My Company > Warehouse.
Using tree diagrams and the tools provided in Monsoon, you will be able to set up and manage a visual model of your warehouse.
These diagrams are built upon the characteristic Warehouse Locator Code.
The information in this guide should be used as a follow-up to the discussions you’ve had with your Monsoon Account Manager.
This guide will supplement your Monsoon Implementation Plan, helping you to find various features and components, as well as help you to understand how to use your new software.
Warehouse locator codes have the following format:
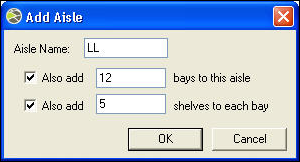
Location - Zone - Aisle - Bay - Shelf - Unit
Each hyphenated portion of the locator code corresponds to a tier within your warehouse model. Each tier will have a real-world equivalent in your warehouse.
A typical warehouse locator code will look like this:
L - Z - A - 001-002 - 5
Warehouse Locator Code Structure |
|
Tier |
Locator Code Example |
Character Type |
Character Limit |
|
Location |
L |
alphanumeric |
3 |
|
Zone |
Z |
alphanumeric |
1 |
|
Aisle |
A |
alphanumeric |
2 |
|
Bay |
001 |
numeric |
3 |
|
Shelf |
002 |
numeric |
3 |
|
Item |
5 |
numeric (assigned automatically) |
N/A |
Monsoon Marketplace Warehouse models your inventory locations using a branching tree diagram. It is a simple process to add components to this model.
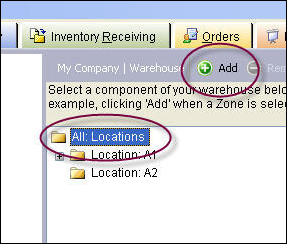
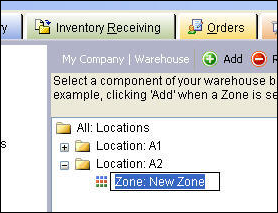
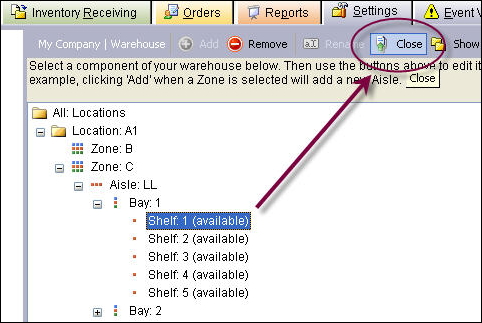
Viewing your Warehouse components is a simple process.
Click the + sign next to the component you want to expand in the viewer.
You may expand any component down to the Shelf level.

When you create a shelf in Monsoon Marketplace Warehouse, it defaults to the “Open” state.
Soon after you close a shelf, the items on that shelf will be priced and listed per your Price and Marketplace settings.
In some rare cases you may find that you need to close a shelf from the Settings Screen (normally this is done when a Receiving session has been completed).
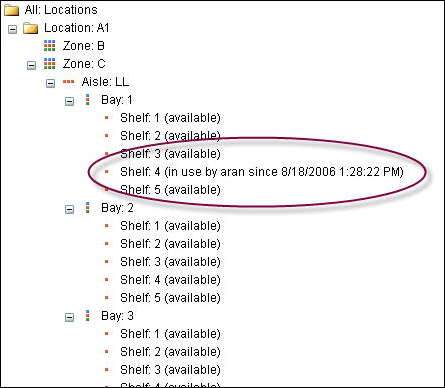
When a shelf is open and in use, you'll see which user has that shelf open on the tree diagram. Only one user at a time can receive into an open shelf.
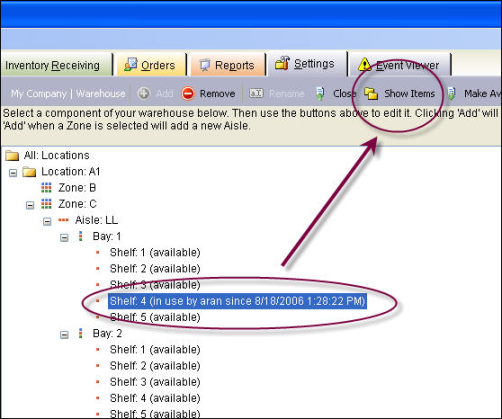
It is possible to get a bird’s eye view of items available on any given shelf.
This will take you to the My Inventory screen, and show you a filtered list of all items with that Locator Code.
To merge one shelf into another, you are essentially moving the contents of the first shelf onto the second shelf.
Let’s assume that you want to merge Shelf 4 into Shelf 1
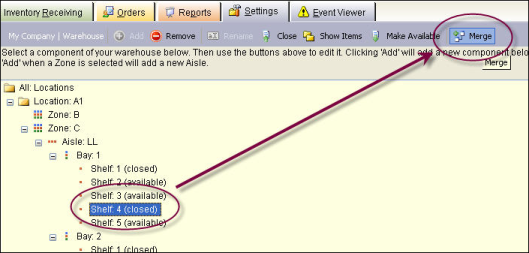
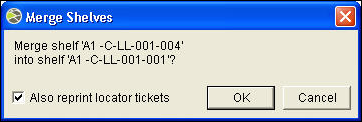
The target shelf is now available.
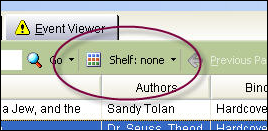
All items received into Monsoon Marketplace Warehouse must be assigned to a shelf.
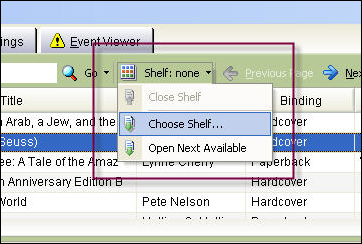

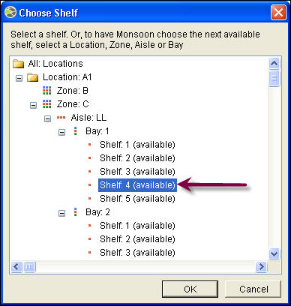
Monsoon will open a dialog displaying your warehouse tree diagram.
Now you are ready to receive items to your specified shelf.
When you receive items, you may wish to print a Locator Slip to place on the item, as well.
Monsoon Marketplace Warehouse Locator slips display:

With a Locator Slip in place, it is possible to view items on a shelf and select an item without needing to pick it up off the shelf to see if it is the correct one.
Using Locator Slips can significantly increase picking speed.
Go to Settings > My Company > Locator Codes
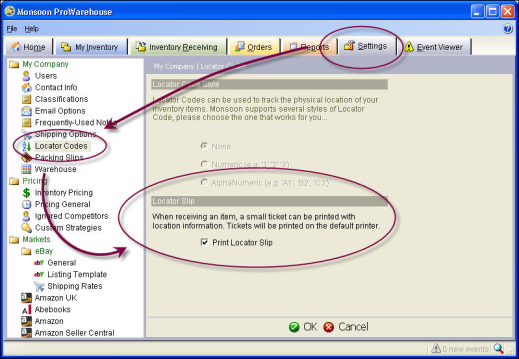
See also Locator codes and locator slips.
The Rapid Receiving feature in Monsoon Marketplace Warehouse allows you to assign a special Rapid Receiving permission to User Roles.
Using Rapid Receiving, a receiver’s task is streamlined for maximum efficiency.
Rapid Receiving restricts Receiver functions to only those features absolutely necessary to accurately receive large quantities of items into inventory at top speed.
Using a Scanner, Receivers simply scan and go:
If you have a Receiving Threshold price set, Monsoon will display the Threshold warning and automatically reject the item.
For more information, see Users, Roles & Permissions.
Any Role with both permissions assigned will not be able to access Rapid Receiving.
Users will only see the standard Receiving screen
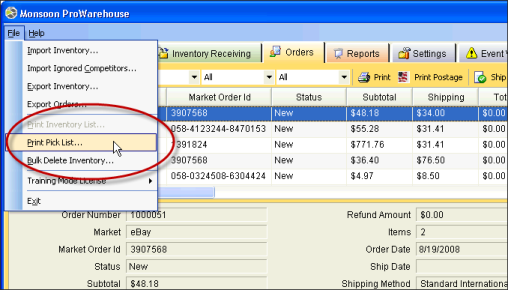
The Print Pick List feature gives you the ability to print a Pick List — rather than individual Packing Slips — when you print your Orders. This facilitates streamlined pick and pack procedures for high volume sellers.
Items on a Pick List are sorted by Locator Code to facilitate an efficient “serpentine” pick pattern.
The Pick List includes only the minimum information necessary to pick warehouse items in an efficient manner
Printing a Pick List will leave all of your selected Orders in whatever Order Status they were in when you selected them.
Printing a Pick List will not set Orders to Printed status.
©2016 Monsoon, Inc. All rights reserved.